
Have you ever left a meeting wondering whether the notes you captured truly reflected the depth of the discussion? Many facilitators question if anyone will revisit, remember, or act on what was documented. Traditional text-heavy notes often fail to capture the energy, connections, and insights that emerge in collaborative conversations.
Graphic facilitation offers an engaging alternative. By combining simple visuals with keywords, it creates a shared “map” of the conversation that is easier to understand and remember. You don’t need to be an artist to use this approach—just a willingness to think visually and experiment with new ways of recording ideas.
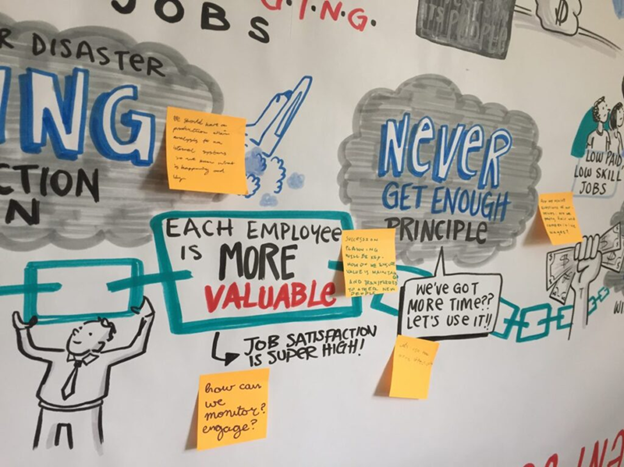
Colors, Shapes, and Arrows
Using color, shapes, and arrows is one of the easiest ways to add visual impact to meeting notes. Different colors can separate themes, highlight priorities, or show progression. Boxes, circles, and varying text sizes help emphasize key ideas, while arrows and connectors illustrate relationships between concepts.
These tools require no drawing expertise, yet they dramatically improve clarity. Instead of a flat list of bullet points, you create a dynamic layout that shows how ideas link together. Over time, participants will find it easier to recall discussions because the visual structure reinforces meaning.
Get Everyone Involved in Drawing
Inviting participants to draw can energize a meeting and deepen engagement. Simple activities—such as asking people to sketch a feeling, metaphor, or response—encourage reflection and creativity. Stick figures, symbols, and abstract shapes are more than enough to express ideas.
Group drawing is especially powerful. When teams collectively create an image, conversation naturally slows down and becomes more thoughtful. The process of deciding what to draw and how to represent shared ideas often leads to richer discussion and stronger alignment.
Mind Maps
Mind maps are a practical way to organize ideas during brainstorming sessions. Starting with a central topic, you branch outward to capture related thoughts, questions, and subtopics. This structure mirrors how people think, making it intuitive and flexible.
Perfection isn’t required. Curved lines, uneven spacing, and quick keywords are part of the process. The goal is not visual polish but clarity—showing how ideas connect and evolve as the conversation unfolds.
Use Graphic Templates
Preparing simple visual templates ahead of time can reduce the pressure of drawing live in front of a group. By setting up basic frames—such as sections, icons, or guiding questions—you create a clear structure that supports the discussion.
Templates also allow you to practice and refine your layouts in advance. As your confidence grows, you can adapt and experiment more freely, knowing that the foundation is already in place and ready to guide participants through the conversation.
Start Small and Keep Practicing
Graphic facilitation doesn’t require a large room or elaborate materials. Even limited space can work if you focus on practicing key symbols, layouts, and visual habits. Consistent practice builds comfort and helps visuals feel more natural over time.
The most important step is simply to begin. Try adding one or two visual elements to your next meeting and observe the response. With each attempt, you’ll develop a clearer, more engaging way to capture and share collective thinking.
Conclusion
Graphic facilitation transforms meeting notes from static records into living artifacts of shared understanding. By incorporating simple visuals, encouraging participation, and organizing ideas visually, facilitators can create more memorable and meaningful outcomes.
You don’t need artistic talent—just curiosity and practice. As you experiment with visual approaches, you’ll likely find that meetings become more engaging, discussions more focused, and outcomes easier to remember and act upon.